Thursday, October 30, 2008

Back to Basics

Nothing special this post... just finally got around to finishing off the second half of that double header pork tenderloin. Everyone around the house has been down with a 24 hour flu bug, so meals have been pretty much non-existent the last couple of nights.

Today, however, everyone was on the upside of things, and I had a craving from a little red meat. Chicken noodle soup only goes so far......


Certainly not a lot of effort went into this one. No mad skills or anything like that. No culinary legerdemain required. Just a hot pan, a sharp knife, and a little attention.

Laid out the tenderloin and sliced it into nice medallions. Salted, peppered and hit each side with a little shot of onion powder. Het up the big skillet till it was good and hot and dropped them li'l medallions right in there. Already had a pot of spuds going on the side, and some carrots simmering in a little butter.

While the pork was cooking, I made a slurry for the graby and had it on ready five. Tossed the coins (get it?... tossed the..... never mind) and got a good sear on both sides and a near perfect doneness throughout. Removed from the pan and covered with some foil to rest and relax.

Since there wasn't nearly enough juice for my liking, I amped up the heat on the pan a bit, and deglazed with some beef and chicken stock to sort of make a mock pork stock. Whisked in the slurry, and let it thicken up nice and easy.

Finished the spuds and carrots, and served it all up.


Again, nothing fancy at all... start to finish about 30 minutes, but it was a knockdown good meal.

Especially after a 2 day diet of canned soup. Heck, my motorcycle boots were starting to look good....


See ya in the kitchen.

Monday, October 27, 2008

Beef.... it's what's for

BREAKFAST!!!

That's right guys and gals... it ain't just for dinner anymore (all due respects to Sam).


Several posts ago I elaborated on one of my periodic meat smoking forays. As mentioned in that post, I take the finished product and divide it up into 'meal size' portions, vacuum seal it and toss it in the freezer for later consumption.


Well, this past Saturday was one of those times. The two oldest kids had gone to a concert, and it was just me, mama, and the wee one for dinner. What to do... what to do... and then mama pipes up that some barbecue sounded fine.


She started some tater salad, I started some beans, and then proceeded to raid the freezer.


One rack of ribs, some pulled pork, sliced brisket and smoked bologna later, the sides were done, the meat reheated, and a glorious 'cue feast was had by all.


At least by all that was at home. Some gets their culture one way, some gets it another....


Anyhoo.... that left me with some leftovers to dispose of... specifically some nice tender brisket.


What to do? What to do? As if I have to ask... Smokehouse Hash! At least that's what I call it.


So this morning, I chopped up some of the brisket, tossed it in a skillet and het it up. Once is was all sizzling and filling the house with delectable aroma (now that's MY kind of aromatherapy), I tossed in a few eggs all beaten up, and scrambled it all up. Topped with some sliced Pepper Jack cheese, covered it a minute to melt the topping, and man o man o man o man.


Don't get me wrong, I loves me some bacon and eggs... or sausage and eggs... or ham and eggs... or sometimes bacon and sausage and ham and eggs. But smoked brisket and scrambled eggs is something that has to be tried to really believe it. Only thing I usually do different is to throw in a generous handful of hasbrowns or home fries. Just didn't take the time this morning.


Bacon imparts a hint, ever so subtle of smoke to the meal, but smoked brisket is a full on, in yer face, up your nose and around your head sensation.


Go on.... try it... I double dog dare ya.


See ya in the kitchen.....

Sunday, October 26, 2008

Goin' South for the Winter

Or at least for the night, anyway.

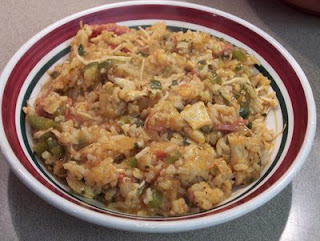
The wife has been having a hankerin' for some Jambalaya, and the oldest has been after me to make some Chicken Bog, so tonight I knocked out a double header.

For those who have been on another planet all their lives, Jambalaya is a staple of cajun cooking. And for those who aren't followers of Ms. Paula Dean, Chicken Bog is a hard core comfort food recipe that she's aired on one of her shows. Her version has more stuff in it than I use, simply because most of the rest of the family wants it simpler.


First up, the Jambalaya.
Nothing magic here, just the basics:
  • Yellow and Green Onions
  • Bell Pepper
  • Italian Parsley for the vegetation
  • Sliced mesquite smoked sausage
  • lightly boiled whole chicken (just to the point that it's done, then cool and pull apart while still juicy)
Heat a big ol' pan with some olive oil, and start in with the peppers. Give 'em a few minutes, add the onions and parsley and a big ol' spoonfull of chopped garlic. Simmer for a few minutes, and take out of the pan. Reheat, and add the sliced sausage. Get a little crusty stuff on there for the flavor, then add the shredded chicken. Return the veggies, add some tomato sauce and stewed tomatos to taste, and maybe some chicken stock, depending on how wet you like it. Add about 3 cups of cooked rice, and let it all mellow and get acquainted for a few minutes. And add whatever herbs, spices, etc. that you like, including cayenne, or whatever. I like to add some file powder right at the end.
You can also do this and add a lot more stock to the pan, and cook the rice with the meat and veggies, but I find the leftovers are gummy and starchy when I do that. This way, all the starch stays out of the main dish.


The Chicken Bog is about one of the simplest comfort foods there is.
You've all had chicken and rice before, but until you have this one, you ain't had it good.
I usually start with a whole chicken, toss it in a big pot full of water, along with a cubed onion.
Toss in a bayleaf for tradition's sake.
Cook the bird until it's done and remove. Let cool, and pull all the meat off and just tear it into shreds with your fingers. I usually strain the stock to get rid of any solids and add it back to the pot.
At this point, you want about 2-3 quarts of stocky goodness. I either keep some cans of stock on hand, or some soup base, whichever I feel like using. (I know, it's not natural or rustic, but I'm a cook, not a chef). Put the heat on medium and toss in 1 1/2 - 2 cups of rice, depending on how hungry y'all are, or how many moufs you gots to feed.
After the de rigeur 20 or so minuteses, the rice is pretty much done, so toss back in the chicken, and add 1 stick of butter.

That's right... 1 whole stick of butter.

Right there in the pot... right in there with all the other stuff.

No margarine... none of this 'I can't believe it's edible', none of that junk.

Just real butter. Heck, you can even use salted butter, if you're feeling wreckless, although keep in mind that if you used canned stock or soup base, there's a fair amount of salt in those already.

Cook it down until you can just see the rice and chicken under the top of the stock. Also, this depends on how thick you wants it. More stock is like chicken and rice soup. Less stock is like a chowder. I personally likes it less juicy. Sticks to the ribs better that way.
From that point on, add whatever you want. My crew likes it plain, so I augment once it's in the bowl: a little ground sage and crushed red pepper, and I'm set.

Also did a batch of Cheddar Biscuits today with the awesome help of my 4 year old. She was okay until it came time to put them in the oven... she wasn't ready for that, but she liked what came out.


Today's menu costs ran like this:

  • 2 small fryers.... about 3 bucks each.
  • Smoked sausage.... 2.50
  • veggies.... 2.00 or so
  • rice.... $1.50 or so
  • butter.... about 60 cents
  • Biscuits.... about 3 bucks for the cheddar, everything else was pantry stock.

Time to prep and cook:

  • 15 minutes prep on the biscuits
  • 20 minutes prep on the jambalaya
  • 10 minutes to shred the chicken for both
    30 minutes stove top time including rice and everything else.


So, all totaled, an hour and fifteen minutes, and everything was made from scratch. Total cost for everything was about 17 bux, and there's enough leftovers in the fridge to feed the Louisiana National Guard. And speaking of leftovers... both of these dishes get better the longer they set in the fridge.

Tomorrow morning's breakfast is scrambled eggs with a side of Jambalaya and Cheddar biscuits
and honey.

Good eatin' y'all..... and see ya in the kitchen.

Monday, October 13, 2008

It's A Wrap...

To carry on with the previous post... while I was buying that big ol' pork loin, I also grabbed a double pack of pork tenderloins.


Loin is good... real good... lean and juicy... but tenderloin... that's sumtin else altogether.


If you're a regular partaker of the tenderloin, you know what I mean. If you're not... you don't know what you're missing.


When I was growing up, tenderloin was a treat around our house. Weren't always a lot of money to go around, and it was a fairly pricey piece of meat. And, mom was from the old school where pork wasn't done until it was overdone. Don't get me wrong... mom is a dynamite cook. But it was sort of a brainwashing thing from growing up on the farm. So I grew up on dry overcooked pork, as a rule. Wasn't till I got grown and able to pay my own medical bills that I started eating my pork cooked medium. So now I cook it like I like it, and I've learned to hit that happy spot between just-done and over-done. The wife is always poking at it, going '..this still looks pink...'


But back to the main topic...


I took one of those tenderloins, and spread some chopped garlic on the inside, along with some thin pats of butter and a sprinkling of sage.


Next came some home made maple bacon. Laid the slices out and rolled the loin right up. Tied it off nice and tight, and set it in the fridge overnight to ponder it's fate.


This afternoon I popped it in a hot pan to sear the sides, then slipped it into the oven for the final turn.


Couple hours later, out came this gorgeous beauty.


I made a reduction of maple syrup and drizzled all over it once it was rested and sliced.


Fed 7 people off of that tenderloin. The double pack cost me $14.14 before tax. That's 7 bux and change for the main course (plus the bacon... which was about 2 bux), so call it 10 dollars even for a Maple Glazed Bacon Wrapped Roasted Pork Tenderloin.

Heck, the name is worth 4 or 5 bux alone.

Add to that some smashed taters w heavy cream (no 2% here), some gravy, and a pan of green beans w new potatos, and dinner was smashing (no pun intended).
I figure I had about $5 in sides by the time it was all said and done... so let's round up and call it $15.00 to feed 7 people. (We had company)... even with New Math, that's a little over $2.00 a head.

Sure, it took time to wrap the meat, peel the taters, and whip up some gravy. I figure all totaled, I had about 45 minutes of actual work involved. Maybe an hour counting the wrap up and serve time.


So again... I challenge you to think about what you're really spending your money on, and if you're really getting your money's worth. If you ain't getting back to basics... chances are you're too wrapped up in 'saving time'.

See ya in the kitchen.....

Sunday, October 12, 2008

Less is more... more or less....

This post is all about getting more for less. I do all the cooking in the house, so I also do all the grocery shopping. This means I get really in tune with what things cost, as does anyone who buys the food.

We're a family of 5, and we like to eat, so keeping the grocery budget in check is always a challenge.

I used to just wing it without a list, but got tired of getting 90% of what I needed. Now I use a list. Always. Went to the store a couple months ago without my list... and was lost. Muddled through it, and managed to get most of what I needed... but it was scary, man.

But, I digress.

Some time back, I was buyin the groceries for the week, and wanted some grilled pork chops. Picked up some butterflied pork loin chops for about $4.59 a pound. Not bad... they were good.

But I had a problem paying almost 5 bucks a pound for pork chops... call me cheap.

So... next time we made a trip to the local bulk store (Sam's Club in these parts), I wandered over to the meat department. There I spied a whole bunch of cryovac'd whole pork loins.

Author's note: From here on, the events actually took place this afternoon. Just keepin' it fresh...

Remembering that I had a Foodsaver vacuum sealer at home, I snatched one up.

Cut to home... the kitchen... me with knife in hand. I sliced open that cryo pac, washed the loin off and tossed it on the cutting board.


Starting at the big end, I started slicing. I kept the chops at roughly an inch thick. This is plenty thick enough to stay juicy when grilled, but thin enough to cook in just a few minutes. After a couple of minutes, there were 4 groups of 5 nice, thick pork chops. The tail end of the loin was just too small and soft to really make a good chop, but I butterflied it a couple of times, worked it thin, and sliced it up for stir-fry. Got enough for a nice pork lo mein or pork stir-fry.


All that was left was a little pile of trimmings about the size of an avocado seed. That's them in the upper left corner of the picture above.


That's 5 meals for a family of 5 people. This guy was almost a 9 pound pork loin. Cost me a bit over $16.50. Even throwing in tax, this was just right at $2.00 a pound for thick juicy pork loin chops.
I can't buy hamburger for that.
So call it 17 bucks, split 5 ways...that's like $3.50 a meal for the meat portion. Throw in some spuds, rice, stuffing, whatever, and I can usually keep a meal under $10.00 for the 5 of us... and that's everything cooked fresh, from scratch, with the possible exception of some canned veggies... depends on the season.
What's my point in all this?
I dunno... I mean, times is tough, and getting tougher. Prices is rising, and there's no end in sight. Sure it's easy enough to just roll over and take it.
Or, with a little intelligent thinking... a little bit of work (hey.... it's playing with meat. What work?), and about the same money (OR LESS!) than you'd spend on pre-packaged, pre-cooked, pre-digested meetza... you can eat well.
When I cook like this, I know exactly what's in the food and how it was cooked. No hidden sugars, nitrates, preservatives, or other nasty stuff that I can't pronounce. And you know what? It just plain tastes better.
See ya in the kitchen.....

Monday, September 22, 2008

Sunday Smokin'

Well, it'd been way too long since I'd fired up the smoker, so I thought it was high time. Saturday, I got hold of a nice little 11 pound brisket, a 9 pound pork shoulder, three really nice racks of spareribs and about 10 pounds of bologna.

Saturday night (Nosh night, see post below) after all the cleanup was done and everyone had gone to bed I started in with the prepwork. I peeled and trimmed the ribs and rubbed them down with my favorite dryrub. Then I did a little injecting into the pork butt and rubbed it down all around as well. Next up I poked the brisket all over to get it good and tender and liberally applied the dry rub to all surfaces. Last up was the three rolls of bologna. Peeled the wrapper, poked numerous holes in it, and rolled it in the rub.

Here's the brisket, butt and ribs all prepped up and ready to hit the chill chest for the night.

Here's the bologna all poked and seasoned too.

Next morning I got the smoker all fired up and a good temp working with some hickory all wet and ready to hit the fire. About three hours later, here came the bologna.....


Another hour or so, and the ribs got pulled and wrapped in foil for another three hours of cook time...


And last but not least, the brisket and the butt got hauled out...


The brisket was perfect. Easily sliced and soft enough to pull apart with a fork.


The butt wasn't as tender as I like it, so I fired up the oven to about 195, and dropped Mr. Pigbutt in there for an overnight meditation on the fine art of being tender.


Next morning (actually, this morning) about 6 I pulled that butt out and, my oh my.... fork tender doesn't even come close.


All I had to do was give it a mean look and it just came apart.

Literally.


It took about 2 minutes to pull this whole half sheet.


Now I just chill it, vacuum seal it, and I'm good for a few months. I generally portion the brisket, pork butt and bologna into 1 pound portions and seal each one individually. Ribs generally get sealed up whole. That way, when me and the missus get a hankerin' for some 'cue on a Satruday afternoon, we can pull out a little of each one. A couple minutes in the microwave (it's sealed, so it just steams itself), and we have smoked meat that is absolutely as good as it was the day I smoked it.

Add sauce and whatever condiments you want, and you have a 'cue feast fit for a king.

And the best part of all... is knowing that I did it all on my own and don't have to spend a fortune on 'cue from the local pit.

Saturday, September 20, 2008

Nosh Night

Every couple of months or so around our house, we have what we call 'nosh night'. What that means is I spend a couple of hours in the kitchen cooking up a variety of snack foods so that everyone can snack and generally have an easy night of it.

Sounds fun, huh?

I don't complain though... If I didn't like cooking, I wouldn't do it.

Over time, our menu has come to include some basic staples. Pretty much the same things you'd find on any halfway respectable Superbowl Sunday... Buffalo Wings, Chicken Strips, Cheese Dip, etc.

Tonight we added a new item to the venue, and it turned out so well, I thought it worth posting about.

Tonight's menu consisted of:
Our World Famous Hotwings. I don't really call em Buffalo wings because... well... we don't live in Buffalo, and Tulsa Wings just doesn't do much for me.


Everybody's favorite Velveeta Cheese and Rotel Tomato dip, other wise known hereabouts as simply Rotel Dip. Although I usually fry up a little ground beef to add into mine, carnivore that I am.


Guacamole and chips... 'nuff said.


Hard Rock Chicken Strips. Got this recipe somewhere or another, and it's supposed to be the one they serve at all the Hard Rock Cafe's for about twice what they're worth.


Potato Salad and Deviled Eggs. (I know... no meat, but what the heck... the eggs have protein, so it's sorta close to meat)


And the new kid on the block... one that I've been wanting to try ever since I saw the special on Deep Fried foods around the country on the Food Network... that delicacy known as Texas Toothpicks... DEEP FRIED BACON!!!

Yes... that's right. Bacon that is breaded and deep fried... then served with a side of white gravy for dippin purposes.

I have to admit it... I had at least 2.2 seconds worth of doubt about this... but then I figured what the heck? It's bacon.. so that's a plus. It's breaded... that's a plus... and it's deep fried... that's a double plus with a 10 point bonus. So when I broke it down I realized that there ARE NO drawbacks, I plowed blindly ahead.

This is so simple to make that it's almost embarassing to write it out. I took a package of my recently home made maple bacon (see previous post), ran it through a little egg wash, and shook it around in a ziptop bag of flour and a little pepper, and dropped it in hot oil for about 5 minutes. (Your cooking times may vary)

Whipped up a little white gravy on the side for dippin, and holy cow! It was everything I'd heard and imagined it to be. A whole new way to consume that most delectable of meats.

The bad part was... I was the only one in the house who would eat it.
The good part was... I was the only one in the house that would eat it...
My oldest was convinced I now have a front row reservation in some dietary hell for doing this... but she's 20 and still has a metabolism that works, so what does she know?
If you've thought about making some deep fried bacon, don't wait any longer. If you haven't thought about it yet, consider yourself on notice.

Monday, September 15, 2008

Well... here goes nuttin....

Greetings... and welcome to my blog.

Been on the fence about this for awhile, simply because blogs take time, and time is getting to be a precious commodity.
Having said that, I've developed a keen interest in the various techniques of preserving and preparing meat, as well as having a lifelong love of cooking... so this is my way of paying it back to all those web authors who have inspired and informed me, as well as maybe passing on a nugget or two to whoever might get some value out of it.

Once this gets going, I'll get my act together some more, and this will be a little more organized.

And I have a hunch that some of the stuff I blog about will include pet peeves and other stuff that just irritates the heck out of me.
What the heck... the blog is free, and therapists cost an arm and a leg...

So, to get something on the page, here's a pic of my latest pass at some homemade bacon. This was 2 12 pound pork bellies, and I wound up with a whole ton of bacon, and a couple wheels of some really good pancetta.


And a close up of the pancetta. It was my first attempt, so it's uglier than a homemade fence, but it tastes oh so good.


When I made this last batch, I didn't take the time to get pictures of all the steps. I will next time though. But for anyone who's done it, and is curious, here's the cure recipe I used:
  • 1 cup kosher salt
  • 1 cup brown sugar
    * Per pork belly
that's it. At the time I didn't have any curing salt, and I've made great bacon without it, although I've since gotten some and will use it in the future, if only for the color retention.

I cut each belly in half and trimmed to get it more or less square. Any large end pieces I sliced up and threw in a skillet for fresh side meat. Generously rub each side of the belly with the cure, pressing it in a little bit. Put the trimmed half belly in a 2 gallon zip top bag. In my case, I put in a generous dollop (1/3 cup or so) of maple syrup and schmoozed it all around in the bag. Toss it all in the fridge. I turned it about twice a day, usually once in the morning and once in the evening. Let it cure for 4 days.
On day 5, I pulled it out, rinsed everything off, and put each belly back in it's bag. Then I added about 2 cups of water to each bag, sealed it, and tossed it back in the fridgedator. About 12 hours later, I pulled it all out, rinsed and dried it all off, and set about drying the bellies.
This is a daunting task, simply because they are big, and no one wants large cuts of raw meat lying around in their fridge. I got around my dilemma by using some rib racks for my smoker. I put 2 racks in a half sheet pan, stood the bellies on end inside the rack. About 24 hours in the fridge, and I had that wonderful tacky dry pellicle.

Then it was off to the smoker for a few hours. After a good cool down period overnight, I sliced and vacuum sealed. The rest, as they say, is history.